It's always a huge pain, to migrate a complete build application to use Server side rendering. I bet everyone(>90%) of us have had this thought that they will start the next project with SSR in mind, but alas!
We at Anar also faced this problem, to migrate our Mweb application to reap the benefits of SSR, like better SEO, image previews in various link sharing.
The app was React JS based, so the obvious choice was to use NextJS. We began exploring it, however quite a daunting task it was. We needed to handle all the Routes as NextJS handles, routes get translated to folder names. It was really painful and we didn't have enough time to continue.
Next option was using Prerender, open source and free, and we were done with our actual requirements in a day. Following are the steps needed along with the issues faced, also some optimisations that we did.
- Boot up a fresh server. It's always a good thing (IMO) to keep your services separate. Prerender uses headless chrome browser in background, which can get pretty heavy depending on the actual expected traffic.
- Clone the prerender repo.
- Install NodeJS (Prefer latest version).
- Install and Configure Nginx. You can view my configuration here.
- Fire up your prerender server using
node server.js(Inside the cloned repo from step-2). Please use Forever npm package, or some other tool to keep it alive across reboots and failures. - Confirm the changes with
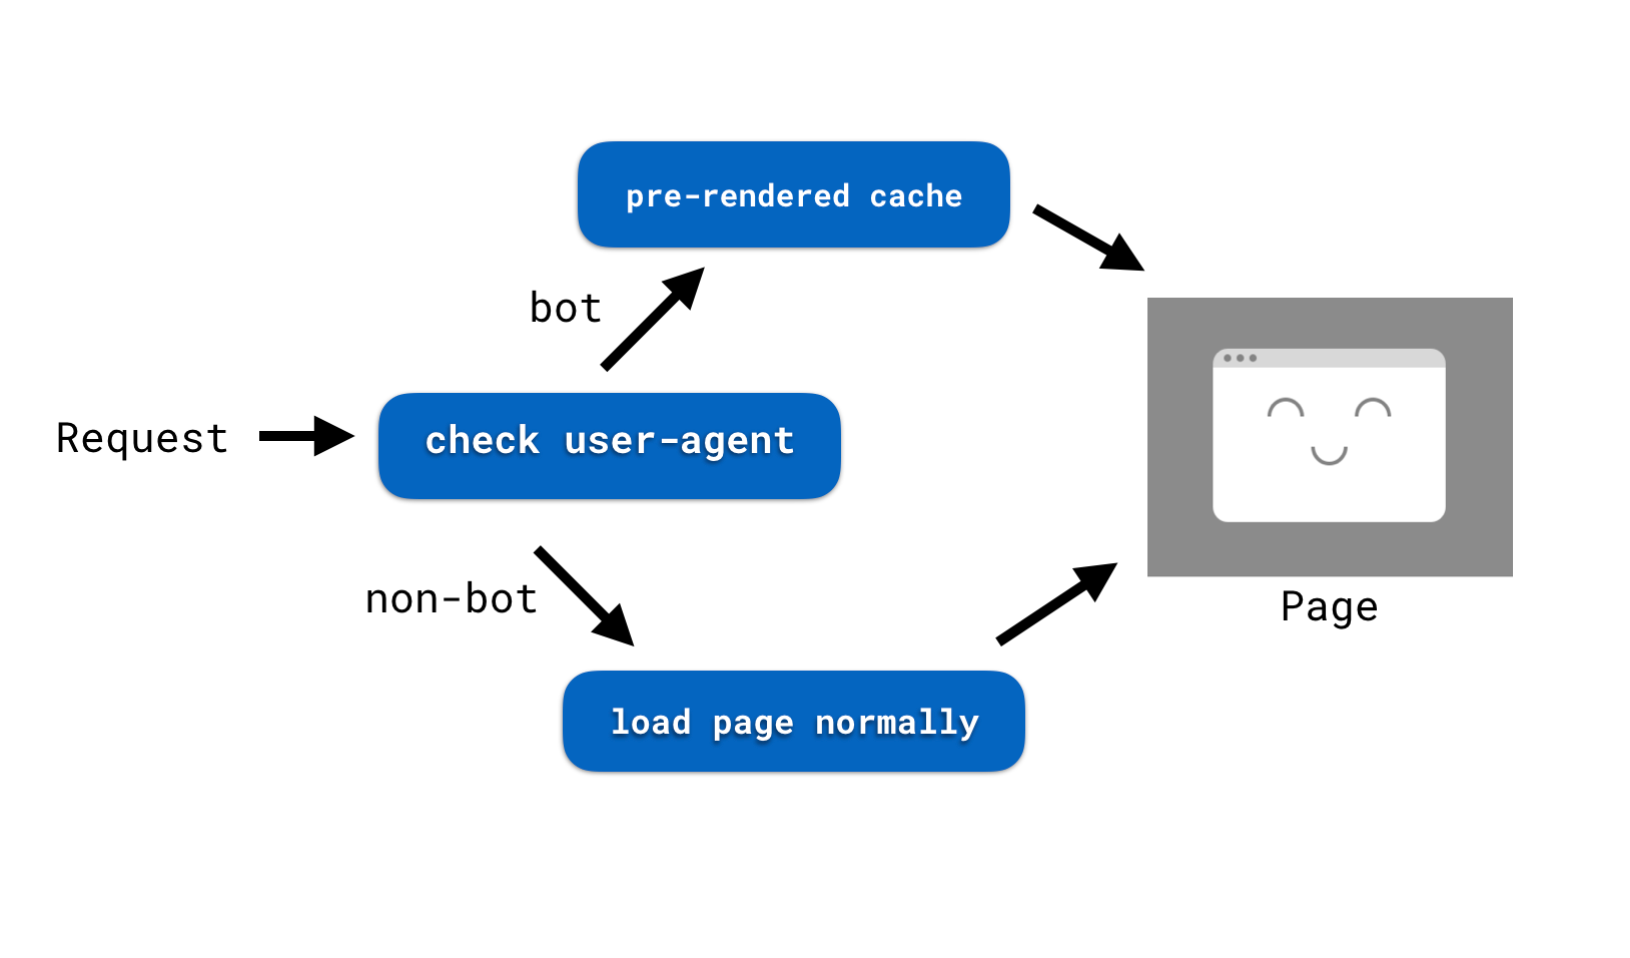
curl -A twitterbot https://xyz.comThis should render the entire html,https://xyz.comin browser, renders the SPA as usual before.
Now one part of our tasks is done. We have successfully rendered pages server side, for curl requests.
Next problem was, every request was taking too long a time to actually return a response. We needed to cache the results. And prerender already supports variety of solutions for this, eg memory-cache, redis-cache, s3-cache.
I used AWS S3 for this. Storing big html documents in redis didn't seem like a very good idea. prerender-aws-s3-cache came in quite handy. All you need to do is tweak your server.js file to use it.
Do npm i prerender-aws-s3-cache dotenv and the edit `server.js` as below:
#!/usr/bin/env node

require('dotenv').config();

var s3cacher = require('prerender-aws-s3-cache');

var prerender = require('./lib');
var server = prerender();

console.log(process.env.REDIS_URL);

server.use(s3cacher);

server.use(prerender.sendPrerenderHeader());
server.use(prerender.removeScriptTags());
server.use(prerender.httpHeaders());

server.start();
Also, create a .env file and export the following variables from there:
AWS_ACCESS_KEY_ID='xxxxxxxxxxxxxxxxxxx'
AWS_SECRET_ACCESS_KEY='xxxxxxxxxxxxxxxxxxxxxxxxxxxxxxxxxxxxxxxxxxx'
S3_BUCKET_NAME='bucket-name'
AWS_REGION='ap-south-1'
And now you are good to go with S3 caches. The response time dropped down from 2 seconds to 40 ms.
One more thing that you need to do is, adding lifecycle to the s3 bucket objects. So that the cache files expire after a certain duration.

Just go to the s3 bucket, click management, Click Add lifecycle rule, Add expiry for objects as per your needs, and submit.
